Just shy of 3 years ago we started this laundry room project…145 weeks ago to be exact. But technically the beginning of this project wasn’t the same time that we intended to finish it. We were residing our exterior at that time and needed to replace a few doors with windows to prep the exterior for our new board and batten siding. 10 months ago is when we consider the “kicking off” of this project and it’s been a (major) labor of love.
Let’s do a before and after shall we?
Is this the same house?? No really….is it? We started from scratch in every way. We demo’d down to studs to create a new floor plan because the “laundry room” was actually divided into two TINY rooms – the laundry room and the breezeway. With the dividing wall down, we were able to create a more functional space that serves as the laundry room and mudroom.
Ok let’s talk about these walls. My entire goal with this room was to make it feel like it was original to the home. I wanted nothing to look new…absolutely no drywall was permitted on the premises. 🙂 What looks more old and original than rustic wood walls? We couldn’t do just any wood though, it needed to have lots of texture.
We opted for rough sawn pine. A wood that highlights saw marks, dings, imperfections, and has a rustic nature at its core. I applied a layered stain (which you can read more about here) to achieve this rich chocolatey color and it oozes with character. Check out this post for all the details on the wood and how we installed & stained the walls.
The ceiling, btw, was another attempt to bring back some original character. There were actually wood planks on the ceiling before, tucked behind layers of drywall. Unfortunately it wasn’t in good enough condition to salvage, but replica pine planks in a matching rich brown stain color was easy to achieve. More details on our ceiling can be found here.
The floors…oh my goodness the floors are everything I ever wanted for this room. Old, tumbled, with the most subtle colors varying from beige to rustic red to gray. With the walls and ceiling being so moody, the floors HAD to be lighter to bring light back into the space. Check out this post to see how we installed them.
The real debate between Chris and I was the pattern in which we would lay them. Chris was keen on a traditional running bond pattern while I was set on basketweave. It only took a row or two of dry fitting the bricks to convince him to join the basketweave fan club.
BEFORE (doorway to the breezeway)
BEFORE (inside the breezeway)
(After we removed the door that was here and closed up the wall)
I think we can all agree that the real star of the show is this built in cabinet that didn’t exist before. If I had to pick one project I’m most proud of, it’s this one! It started as a blank wall, then we added two Ikea Pax cabinet frames side by side. Then we framed it out and built a pair of inset drawers and tall shaker doors. (Linked tutorials for both of those projects.)
But details matter so I added dowels along the inner boarder of each shaker door. I layered trim along the bottom for a tall chunky baseboard. The top of the cabinet received crown moulding and a strip of matching decorative trim. And the side of the cabinet needed a little something too so I added box trim and dowels to match the shaker doors.
My goal was to make it look like a custom piece of furniture that just moulded to the space and I’m beyond thrilled with the final outcome. Anything but basic. I sprayed it for an ultra smooth finish in a satin sheen and the paint color is Oatbran by Valspar. The hardware is all antique. 10/10 recommend getting antique hardware for new cabinetry to bridge the gap between the old and new.
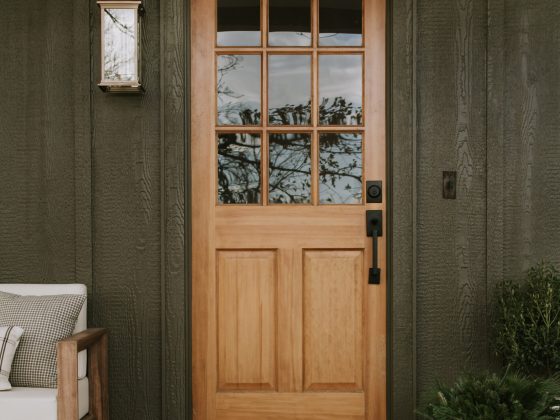
We purchased two 5 panel doors which match the rest of our house – one of which is a double door for the closet where our laundry tower is. I kept the colorway simple by painting them in a matching brown paint color as the walls. Muted Mahogany from HGTV Home by Sherwin Williams.
The interior of our laundry closet is still unfinished but I’ve had plans drawn up for 6+ months. That’s a project we hope to tackle next month!
It’s moody, it’s earthy, it’s natural, and it’s a lot to take in. When I think about how dirty and impractical this space was before, I can’t express how much of a ‘sigh of relief’ and a ‘moment of awe’ this room is for us now. It’s ready for that load of laundry I’ve been putting off.